Reference: MSEgui/TFace
TFace
The visual appearance of a widget is specified by the properties Face and Frame. Face concerns the widget itself, Frame the appearance around it.
Reference
Hierarchy
- TObject
- TPersistent
- TVirtualPersistent
- TNullInterfacesPersistent
- TOptionalPersistent
- TCustomFace
- TFace
Properties
Fade
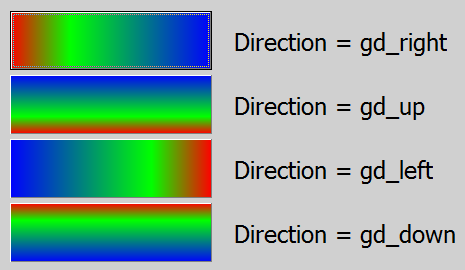
You can specify a color fade with two or more colors. (You can specify with one color too, but that's no fade...)
The picture was generated with the following code. Please not, that green is not exactly in the middle, but moved to the left - the position isn't 0.5, it's 0.3.
procedure tmainfo.Button3Execute(const sender: TObject);
begin
  if Button3.Face = nil then
    Button3.Face := TFace.Create;
  Button3.Face.Fade_color.Count := 3;
  Button3.Face.Fade_color.Items[0] := cl_red;
  Button3.Face.Fade_color.Items[1] := cl_green;
  Button3.Face.Fade_color.Items[2] := cl_blue;
  Button3.Face.Fade_pos.Count := 3;
  Button3.Face.Fade_pos.Items[0] := 0;
  Button3.Face.Fade_pos.Items[1] := 0.3;
  Button3.Face.Fade_pos.Items[2] := 1;
end;
With the Fade_direction you specify the direction:
property fade_direction: graphicdirectionty default gd_right;
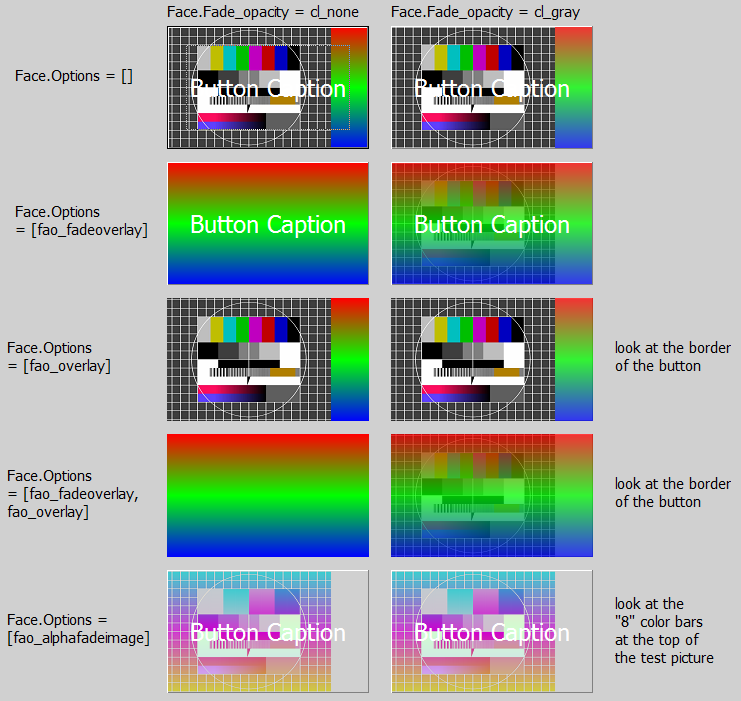
You can also specify a opacity and a fade of it. In the following the left picture is without opacity, the middle is with a opacity fade from cl_white to cl_black from 0.7 to 1, and the right picture is a opacity fade from cl_white to cl_black from 0 to 1 and a underlying picture and options = [fao_fadeoverlay].
With the property Fade_opacity you can specify a opacity for the whole face without any fade. Typical opacity colors are cl_black and cl_white, but you can use every other color.
property Fade_opacity: colorty default cl_none;
property Fade_opapos: trealarrayprop;
property fade_opacolor: tfadeopacolorarrayprop;
FrameImage
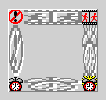
With the property FrameImage you can paint individual frames by using a TImageList. In the imalge list their are used 8 consecutive images. The images for the edges will be stretched as needed - this will look very strange, if this images are not suitable (look the followong picture).
For a "good loking example" see TFrame.FrameImage.
property FrameImage_list: timagelist;
    // imagenr 0 = topleft, 1 = left, 2 = bottomleft, 3 = bottom,
    // 4 = bottomright 5 = right, 6 = topright, 7 = top
property FrameImage_offset: integer default 0;
Framei
You can specify spacings to the borders of the widget:
procedure tmainfo.Button3Execute(const sender: TObject);
begin
  if Button3.Face = nil then
    Button3.Face := TFace.Create;
  Button3.Face.Fade_color.Count := 1;
  Button3.Face.Fade_color.Items[0] := cl_blue;
  Button3.Face.Framei_left := 4;
  Button3.Face.Framei_bottom := 6;
  Button3.Face.Framei_right := 8;
  Button3.Face.Framei_top := 10;
end;
Image
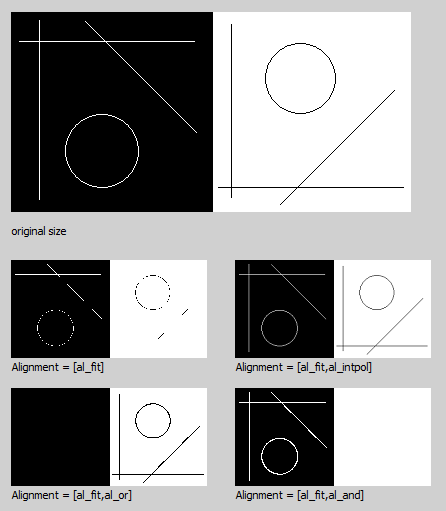
With the property Image you can assign a pixel graphic to the face. Use Face.Image.Mask_Source for masking this pixel grahic. Meanwhile there is no difference between assigning a picture or using Face.Image.Source at use of masking.
procedure tmainfo.ButtonClick(const Sender: TObject);
var
  LRoot: string;
begin
  LRoot := ExtractFilePath(Application.ApplicationName);
  BitmapComp1.Bitmap.LoadFromFile(LRoot + 'FuBK.jpg');
  BitmapComp2.Bitmap.LoadFromFile(LRoot + '112_linien_1.jpg');

  Button1.CreateFace;
  Button1.Face.Image.Source := BitmapComp1;
  Button1.Face.Image.Alignment := [al_fit];

  Button2.CreateFace;
  Button2.Face.Image.Source := BitmapComp2;
  Button2.Face.Image.Alignment := [al_fit];

  Button3.CreateFace;
  Button3.Face.Image.Source := BitmapComp1;     // no masking at earlier versions, works now
  Button3.Face.Image.Alignment := [al_fit];
  Button3.Face.Image.Mask_Source := BitmapComp2;

  Button4.CreateFace;
  Button4.Face.Image.Assign(BitmapComp1.Bitmap);    // masking
  Button4.Face.Image.Alignment := [al_fit];
  Button4.Face.Image.Mask_Source := BitmapComp2;
end;
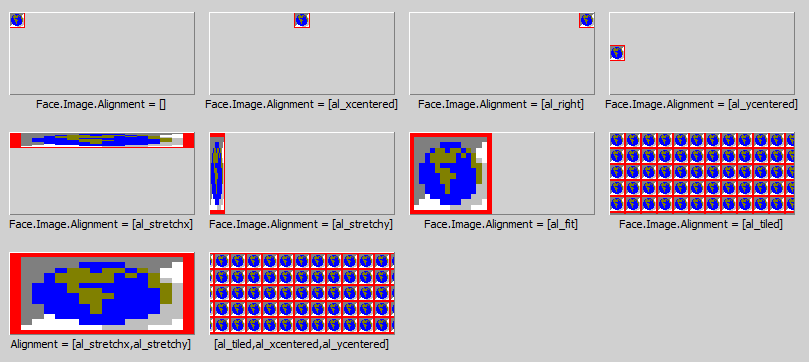
Use the property Face.Image.Alignment to align, stretch or tile the image:
Use [al_NoMaskScale], if you want to scale the picture, but not the mask:
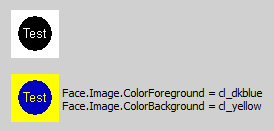
If you have a 2-Color-Bitmap, you can specify with ColorForeground and ColorBackground it's colors:
If you are downsizing pictures with small lines, the al_interpol, al_and and al_or will make a difference (al_and and al_or only with Windows):
- bmo_storeorigformat: Normally if one loads a bitmap at design time a simple proprietary format is used to store the pixel data in the form. If bmo_storeorigformat is set the original imagedata will be stored. That means that at runtime the according mseformat*read unit must be available.
- bmo_runtimeformatdata: Normally the original imagedata of bmo_storeorigformat will be deleted after creating the bitmap handle, bmo_runtimeformatdata inhibits deleting.
- TransparentColor: If bmo_masked is set, one color get transparent and you the instead of it the background. If TransparentColor is cl_default, the color of the pixel in the left bottom corner is used as TransparentColor, otherwise you can specify it with this property.
Assume one loads a ARGB *.png with a 8bit alphachannel. TMaskedBitmap creates a bmk_rgb bitmap for the RGB values and a bmk_gray bitmap for the alpha values, options becomes [bmo_masked,bmo_graymask]. The mask bitmap is TMaskedBitmap.mask, the type is "tbitmap" which has a canvas.
Loading a *.png with a 1bit alphachannel creates a bmk_mono mask bitmap, options becomes [bmo_masked,bmo_monomask]. Loading a RGB *.png without alphachannel does not create a mask bitmap, options becomes [].
Now a mask bitmap can be attached by setting options bmk_masked, setting of bmk_colormask or bmk_graymask defines the bitmapkind of the mask bitmap. The new mask bitmap will be initialised to be transparent for main bitmap pixels with the color of TMaskedBitmap.TransparentColor.
Template and LocalProps
You can assign Template to a TFaceComp-instance to take the face settings of this non-visual component.
If a special property of TFace should not specified by Template but the local TFace-settings, use LocalProps to except this property of template settings for this widget.
facelocalpropty = (fal_options,fal_framei_left,fal_framei_top,
                    fal_framei_right,fal_framei_bottom,
                    fal_fadirection,fal_image,
                    fal_fapos,fal_facolor,fal_faopapos,fal_faopacolor,
                    fal_fatransparency,
                    fal_faopacity,fal_frameimagelist,fal_frameimageoffset);
facelocalpropsty = set of facelocalpropty;

property LocalProps: facelocalpropsty;
property Template: TFaceComp;
Options
faceoptionty = (fao_alphafadeimage,fao_alphafadenochildren,fao_alphafadeall,
                 fao_alphaimage,
                 fao_fadeoverlay,fao_overlay);
faceoptionsty = set of faceoptionty;

property options: faceoptionsty default [];
Methods
Events
Known issues
Issues of the class
Issues of this documentation
Feel free to add your points here.
What do the following at Image:
- origformat

