Form Tutorial
│
Deutsch (de) │
English (en) │
suomi (fi) │
日本語 (ja) │
中文(中国大陆) (zh_CN) │
Back to tutorials.
A small introduction about how to use Forms in Lazarus.
What is a form
The form (class TForm) represents a window or dialog box that forms the user interface of an application. It is the container on which all other components (eg buttons, labels, edit fields, images, etc.) are inserted .
The first GUI app
Even after you have successfully installed Lazarus, after the start of Lazarus a new project with an empty form is created. Otherwise you can create a new GUI application under Mainmenu -> New Project -> New Application.
Now you have already created a new, fully functional project with a form:
To start the newly created project, you can simply press the [F9] key or click with the mouse on the main menu icon ![]() (or Main menu: Start -> Run). The project will be compiled and executed.
(or Main menu: Start -> Run). The project will be compiled and executed.
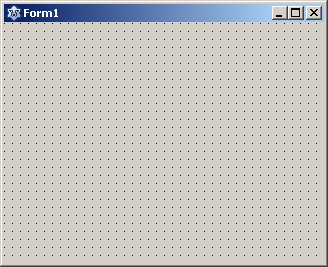
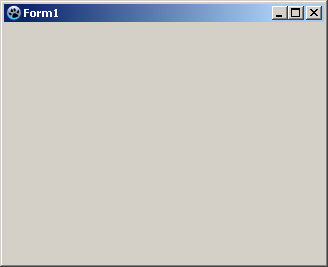
It happens nothing really exciting, the form (Form1) changed but slightly their appearance and the points from the raster grid (help for positioning of individual components) lose (as long as the grid points are visible, you also know that it is still in design mode):
 ->
-> 
Next, we place a TButton onto the form. This will later allow the opening of a second form:
Select the TButton Under the standard component palette
and click on the form: There is a button placed on Form1 with the name and caption "Button1".
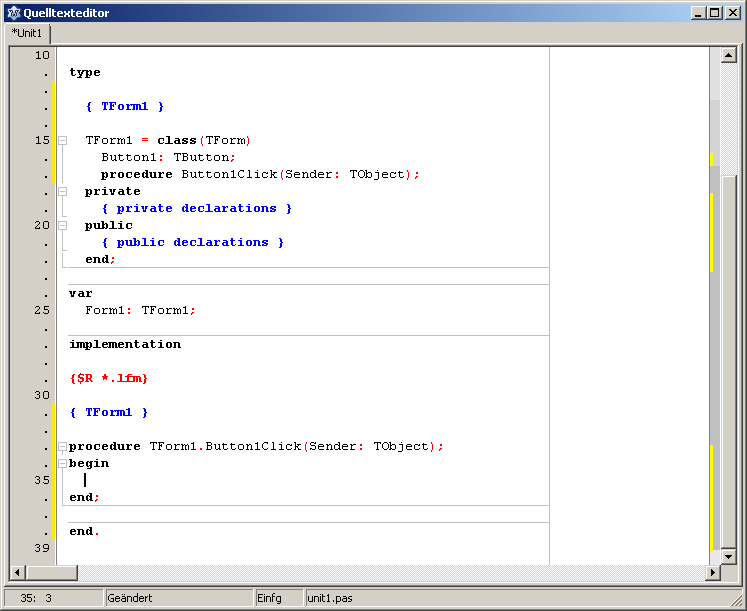
In order for this button also gets a sense that you have to announce that he intended to do something when you click it. Click this can be regarded as a simplified event. For this you need event handler that are called after the jump. The event handler for a mouse click can be quite easily reached in which you double-click on the pasted Button1 (or in the Object Inspector -> Button1 -> Tab Events -> onclick on the button [...] clicks). There a procedure TForm1.Button1Click is now created in the code editor, which is always called (at runtime, not in desingn time) when Button1 is clicked:
Thus the application after clicking on Button1 gets to do something, we simply add between the begin and end of the procedure TForm1.Button1Click some code like:
procedure TForm1.Button1Click(Sender: TObject);
begin
  Caption:='My first Form';  //Caption of Form1 is changed (text in formhead)
  //or
  Button1.Caption:='Hello';  //Caption of button is changed (shown text of button)
end;
Now just start (by pressing [F9]), and be glad ...
The use of a second form
The tutorial shows how one can use multiple forms in a project. In the example, only two forms Form1 (main form) and Form2 can be created for other Forms can be identical procedures.
There is a main form with a button, whose click through to the new form opens. The new form also receives a button whose click through to the new form again closes and you return to the main form.
All that the tutorial The first GUI app would have worked to remove the code between the begin and end of procedure TForm1.Button1Click. All others would have a new project (application) to create, drop a button on the form and create the OnClick event handler of this Button1.
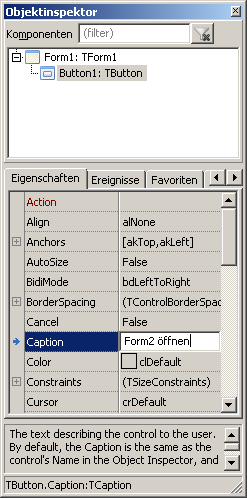
This button we give yet another caption (visible text on the button). For this purpose, select the button (just click once) and the Object Inspector Properties -> Caption to enter text "open Form2".
Under the main menu item File -> new form we are now a second form (Form2) to the project. In this we also put on a button (Button1) and create the OnClick event handler of this. The caption of this button we change analogous to the above "Close"
Now the project has two forms, each can be selected and displayed with main menu -> Forms (or key combination [Shift] + [F12]). In the alternative, you can also in the source editor tab for the particular form of the associated Unit, and show with [F12] the appropriate form (with [F12] to switch between the code editor and form designer).
In the code editor, we now go on to the Form1 associated Unit (Unit1) and add the uses clause "Unit2":
uses
  Classes, SysUtils, ... , Unit2;  //it is important that the individual units are equipped with a comma separated
                                   //and the uses clause ends with a semicolon
Now you can call from Unit1, Unit2 and thus the Form2.
Next, we process nor the OnClick event of the button belonging to the form:
unit Unit1;
...
procedure TForm1.Button1Click(Sender: TObject);
begin
  Form2.ShowModal;  //displays the Form2, the focus is placed on Form2
end;
unit Unit2;
...
procedure TForm2.Button1Click(Sender: TObject);
begin
Close; //close Form2
end;Now we can start the project and open Form1 using Form2 button click.
Two Forms that can call each other
Generally it is cheap (good program design), if not their main form is called of a form. It is better this again return according to previous example, from a main form from, always call and subsequent Forms by the closing of the Main form. Thus, one escapes the problem of a circular Unit - reference. That it theoretically still goes, I will show here.
Either we modify the forms from the example The use of a second form or it must be created with two forms and each with a button a new project. Caption by Form1.Button1 should "open Form2" loud, which of Form2.Button1 would have to be changed "open Form1" after.
This time we can not simply into the existing uses-clause of Unit2 (as in the previous example - in the interface part of the Unit) insert "Unit1", otherwise a circular unit reference would arise. "Unit2" thus would also have to be removed from the interface uses clause of Unit1.
Instead, we add a uses clause in the implementation of parts of the Unit1:
unit Unit1;
...
implementation

uses
  Unit2;
...
unit Unit2;
...
implementation
uses
Unit1;
...Now we can still change the located behind the OnClick event of the button event handler:
unit Unit1;
...
procedure TForm1.Button1Click(Sender: TObject);
begin
  Form2.Show;
end;
unit Unit2;
...
procedure TForm2.Button1Click(Sender: TObject);
begin
Form1.Show;
end;
Passing variables to other Forms
In accordance with Example The use of a second form could be in the interface part of the Unit "Unit2" a global variable declare. This would give you access in Unit1 also in Unit2 to one and the same variable (by inject Unit2 in uses clause of Unit1 all declared in the interface part of the Unit2 variables are available also in Unit1). This procedure should be limited to a minimum, as you quickly can not remember for larger projects, which the individual variables have a meaning and where to access it anywhere (error rate increases).
It is better to use local variables, define it as Property in a Class or, alternatively, as a variable in a class.
In the next project, a second form is opened by clicking on the button. In this case, in the unit of the main form is counted how often the second shape has been shown. In this second form you can ask to see by clicking on the button, how often it has been opened:
A new project with two forms, each a button on it and their OnClick events to evaluate.
Now, in the Public-part of the class TForm2 (Unit2) a variable (in this case a Constant, which we defined as variable abuse) of type integer with the name numerator create:
Nun im Public-Teil der Klasse TForm2 (Unit2) eine Variable (in diesem Fall eine Konstante, die wir als definierte Variable missbrauchen) vom Typ Integer mit dem Namen Zaehler erstellen:
unit Unit2;
...
  TForm2 = class(TForm)
    Button1: TButton;
    procedure Button1Click(Sender: TObject);
  private
    { private declarations }
  public
    { public declarations }
    const Zaehler: Integer = 0;   //hier
  end;
Jetzt noch die Button-Eventhandler entsprechend anpassen:
unit Unit1;
...
procedure TForm1.Button1Click(Sender: TObject);
begin
  inc(Form2.Zaehler);  //Bei jedem Aufruf von Form2 den Zähler um 1 erhöhen
  Form2.ShowModal;     //Form2 anzeigen
end;
unit Unit2;
...
procedure TForm2.Button1Click(Sender: TObject);
begin
ShowMessage('Form2 wurde insgesamt '+IntToStr(Zaehler)+' mal aufgerufen');
end;Auf diese Weise kann man in Unit1 auf alle in Unit2 öffentlichen (public) Variablen/Properties/Funktionen/Proceduren (allgemein Methoden) zugreifen.
Sonstiges im Umgang mit Forms
Andere Form als MainForm verwenden
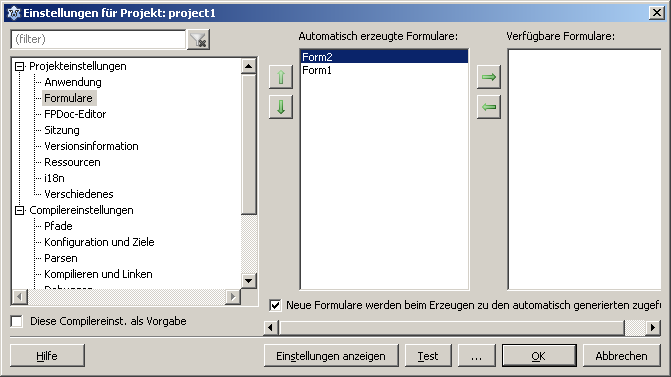
Stellt man nach einer Weile fest, dass man lieber eine andere Form oder neue Form zur Ansicht beim Programmstart angezeigt haben will, kann man unter dem Mainmenu Projekt -> Projekteinstellungen -> die Reihenfolge der Formulare ändern:
Alternativ kann man unter Mainmenu Projekt -> .lpr-Datei anzeigen sich die Projekt.lpr (Pascal-Quelltext des Hauptprogramms) anzeigen lassen und dort einfach die zuerst anzuzeigende Form als erstes erstellen lassen:
program Project1;
...
  Application.CreateForm(TForm2, Form2);  //Form2 wird als erstes erstellt und damit beim Start der Anwendung gezeigt
  Application.CreateForm(TForm1, Form1);
Eigenschaften der Form bei Programmende speichern
Bei manchen Anwendungen ist es schön, wenn die vom User geänderte Einstellungen bezüglich Position und Größe der Form bei Programmende gespeichert werden und bei Programmstart wieder so hergestellt werden. Dafür stellt Lazarus von Haus aus eine recht einfache Möglichkeit mittels TXMLPropStorage oder TIniPropStorage zur Verfügung.
Ein einfaches Beispiel soll die Funktionsweise verdeutlichen:
- neue Anwendung erstellen (Hauptmenu Projekt -> Neues Projekt -> Anwendung)
- eine TXMLPropStorage Komponente auf die Form ablegen (Zu finden ist sie auf dem Tab Misc in der Komponentenpalette)
- im Objektinspektor: XMLPropStorage1 -> FileName auf z.B. "session.xml" setzen
- im Objektinspektor: Form1 -> SessionProperties bearbeiten (einfach den Button [...] anklicken)
- nun jeweils die Properties Left;Top;Width;Height von der Komponente Form1 auswählen und den Selected Properties hinzufügen
- mit OK bestätigen und Projekt starten, die Form in der Größe verändern und verschieben, beim nächsten Start hat es wieder diese Einstellung
Weitere Informationen unter TXMLPropStorage
Form dynamisch erzeugen
Von Lazarus designte Form dynamisch erstellen
Mann muss nicht alle Formulare, die während der Laufzeit einer Anwendung möglicherweise aufgerufen werden, immer bei Programmstart erstellen lassen. Manche Entwickler halten generell nichts davon und löschen den bei Einfügen eines neuen Formulars in ein Projekt automatisch erstellten Code aus der Projekt.lpr sofort heraus. Sobald man z.B. eine Library schreiben will, die ein paar GUIs enthält, kommt man um die dynamische Erstellung von Formularen nicht herum.
Ein Beispiel:
- neue Anwendung mit zwei Formularen, auf Form1 ein Button (in uses-clause von Unit1, "Unit2" aufnehmen)
- öffnen der Projekt.lpr (Projekt -> .lpr-Datei anzeigen)
- löschen der Zeile " Application.CreateForm(TForm2, Form2);"
- im OnClick-Ereignis von Form1 Button1 folgenden Code einfügen:
procedure TForm1.Button1Click(Sender: TObject);
begin
  Form2:=TForm2.Create(Nil);  //Form2 wird erstellt
  Form2.ShowModal;            //Form2 wird angezeigt
  FreeAndNil(Form2);          //Form2 wieder freigeben
end;- nun einfach starten
Neue Form dynamisch erstellen
Folgendes Beispiel soll demonstrieren, wie neue Forms per Hand, ohne den Formulardesigner, erzeugt werden können.
Mit einem Buttonklick soll sich eine weitere Form öffnen, die einen Button enthält, bei dessen Klick eine Warnmeldung erscheint, dass sich die Form schließen wird und daraufhin die Form geschlossen wird.
- neue Anwendung mit einem Formular und einem Button
- im OnClick-Ereignis von Form1 Button1 folgenden Code einfügen:
procedure TForm1.Button1Click(Sender: TObject);
var
  MyForm: TForm;
  MyButton: TButton;
begin
  MyForm:=TForm.Create(nil);             // Formular erzeugen
  MyForm.SetBounds(100, 100, 220, 150);  // Größe der Form
  MyForm.Caption:='Meine dynamisch erstellte Form';

  MyButton:=TButton.create(MyForm);      // Den Button erstellen, der Owner wird MyForm
  MyButton.Caption:='Schließe meine Form';
  MyButton.SetBounds(10, 10, 200, 30);
  MyButton.Parent:=MyForm;               // Festlegen, auf welcher Form der Button platziert wird

  MyButton.OnClick:=@MyButtonClick;      // Wird gleich noch erstellt...

  MyForm.ShowModal;                      // MyForm anzeigen

  FreeAndNil(MyForm);                    // MyForm (und MyButton) wieder freigeben
end;
Hinweis: Wenn eine Komponente mit einem Owner erzeugt wurde (TButton.Create(Owner: TComponent)), gehört sie dem Owner, der dann dafür zuständig ist, die Komponente freizugeben. Somit wird MyButton bei der Freigabe von MyForm automatisch mit freigegeben.
- Jetzt muss noch der Eventhandler von MyButtonClick erstellt werden
- Dazu im private-Abschnitt der Klasse TForm1 folgende Procedure hineinschreiben und [Strg]+[Shift]+[C] (Codevervollständigung) drücken:
  TForm1 = class(TForm)
...
  private
    { private declarations }
procedure MyButtonClick(Sender: TObject);- und folgenden Code dort einfügen
procedure TForm1.MyButtonClick(Sender: TObject);
begin
  Showmessage('Achtung, meine dynamisch erstellte Form wird geschlossen!');
  if Sender is TButton then
    TForm(TButton(Sender).Parent).Close;
end;- nun kann das Projekt kompiliert und gestartet werden
Ein paar Tips für die manuelle Erzeugung von Bedienelementen
--Michl 15:22, 8 May 2014 (CEST)

