Difference between revisions of "TRadioButton/fr"
(Created page with "{{TRadioButton}} Un '''TRadioButton''' image:tradiobutton.png est un composant qui affiche un bouton de sélection qui fonctionne avec d'autres RadioButtons d'une manièr...") |
|||
| Line 3: | Line 3: | ||
Un '''TRadioButton''' [[image:tradiobutton.png]] est un composant qui affiche un bouton de sélection qui fonctionne avec d'autres RadioButtons d'une manière mutuellement exclusive - Si un button est sélectionné, aucun des autres dans le groupe ne peut être sélectionné. Le composant TRadioButton se trouve dans l'[[Standard tab/fr|onglet Standard]] de la [[Component Palette/fr|palette de composants]]. | Un '''TRadioButton''' [[image:tradiobutton.png]] est un composant qui affiche un bouton de sélection qui fonctionne avec d'autres RadioButtons d'une manière mutuellement exclusive - Si un button est sélectionné, aucun des autres dans le groupe ne peut être sélectionné. Le composant TRadioButton se trouve dans l'[[Standard tab/fr|onglet Standard]] de la [[Component Palette/fr|palette de composants]]. | ||
| − | + | Pour utiliser un RadioButton sur une [[TForm/fr|fiche]], vous pouvez simplement le sélectionner sur la palette de composants ''Standard'' et le placer, avec un clic sur la fiche.<br/> | |
| + | Il ne sert à rien en général de poser un seul RadioButton, car les RadioButtons sont prévus pour choisir entre plusieurs alternatives. Ainsi, vous pouvez utiliser aussi un | ||
| + | [[TRadioGroup/fr|TRadioGroup]] à la place de RadioButtons individuels. | ||
| − | + | Partout dans votre code source, vous pouvez obtenir l'état des RadioButtons, actif ou inactif, en interrogeant '''<code>Status := <RadioButton>.Checked;</code>'''. Vous pouvez utiliser ''Checked'' comme un [[Boolean/fr|booléen]] normal. Ainsi, l'affectation '''<code><RadioButton>.Checked := True;</code>''' est possible. | |
| − | |||
| − | |||
| − | |||
= Un simple exemple = | = Un simple exemple = | ||
| − | * | + | * Créez une nouvelle application et placez trois RadioButtons sur la fiche. |
| − | * | + | * Dans l'onglet Propriétés de l'inspecteur d'objets, changez les noms des RadioButtons en ''rbRed'', ''rbGreen'' et ''rbBlue''. |
| − | * | + | * De la même façon, vous pouvez changer les intitulés des RadioButtons en ''Red'', ''Green'' et ''Blue''. |
| − | * | + | * Ajoutez à votre fiche, un bouton et changez son intitulé en ''Draw new'' et son nom en ''btnPaint''. |
| − | * | + | * Créez le gestionnaire d'événement ''OnClick'' pour le bouton, en utilisant l'onglet Evénements de l'inspecteur d'objet, sélectionnez l'événement OnClick et cliquez sur le bouton [...] ou double-cliquez le bouton sur la fiche. |
| − | * | + | * Ajoutez le code suivant : |
<syntaxhighlight> | <syntaxhighlight> | ||
procedure TForm1.btnPaintClick(Sender: TObject); | procedure TForm1.btnPaintClick(Sender: TObject); | ||
| Line 25: | Line 24: | ||
end; | end; | ||
</syntaxhighlight> | </syntaxhighlight> | ||
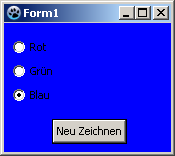
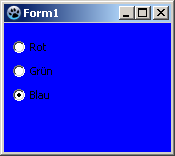
| − | * | + | * Ouvrez votre application, elle devrait ressembler à quelque chose comme cela : |
[[image:RadioButtonExample1.png]] -> [[image:RadioButtonExample2.png]] | [[image:RadioButtonExample1.png]] -> [[image:RadioButtonExample2.png]] | ||
= Usage d'un événement = | = Usage d'un événement = | ||
| − | + | A la différence avec l'exemple précédent, nous ne repeignons pas la fiche en cliquant sur le bouton mais en cliquant sur les RadioButtons eux-mêmes.<br/> | |
| − | + | Vous pouvez modifier l'exemple précédent, en supprimant le bouton et son gestionnaire d'événement ''OnClick'' dans le code source, vous pouvez créer un nouvel exemple mais aussi simple : | |
| − | * | + | * Créez une nouvelle application et placez trois RadioButtons sur la fiche. |
| − | * | + | * Dans l'onglet Propriétés de l'inspecteur d'objets, changez les noms des RadioButtons en ''rbRed'', ''rbGreen'' et ''rbBlue''. |
| − | * | + | * De la même façon, vous pouvez changer les intitulés des RadioButtons en ''Red'', ''Green'' et''Blue''. |
| − | * | + | * Maintenant vous pouvez créer les gestionnaires d'événement pour les RadioButtons. Pour chacun d'eux, vous pouvez utiliser l'onglet événements de l'inspecteur d'objet, sélectionner l'événement ''OnChange'' et cliquez sur le bouton [...], vous pouvez aussi double-cliquer dessus. |
| − | * | + | * Faites changer la couleur de la fiche par le gestionnaire d'événement ''OnChange'' selon le RadioButton sélectionné : |
<syntaxhighlight> | <syntaxhighlight> | ||
procedure TForm1.rbRedChange(Sender: TObject); | procedure TForm1.rbRedChange(Sender: TObject); | ||
| Line 55: | Line 54: | ||
end; | end; | ||
</syntaxhighlight> | </syntaxhighlight> | ||
| − | * | + | * Ouvrez votre application, elle devrait ressembler à ceci : |
[[image:RadioButtonExample3.png]] -> [[image:RadioButtonExample4.png]] | [[image:RadioButtonExample3.png]] -> [[image:RadioButtonExample4.png]] | ||
Revision as of 07:40, 29 August 2017
│
Deutsch (de) │
English (en) │
suomi (fi) │
français (fr) │
日本語 (ja) │
Un TRadioButton ![]() est un composant qui affiche un bouton de sélection qui fonctionne avec d'autres RadioButtons d'une manière mutuellement exclusive - Si un button est sélectionné, aucun des autres dans le groupe ne peut être sélectionné. Le composant TRadioButton se trouve dans l'onglet Standard de la palette de composants.
est un composant qui affiche un bouton de sélection qui fonctionne avec d'autres RadioButtons d'une manière mutuellement exclusive - Si un button est sélectionné, aucun des autres dans le groupe ne peut être sélectionné. Le composant TRadioButton se trouve dans l'onglet Standard de la palette de composants.
Pour utiliser un RadioButton sur une fiche, vous pouvez simplement le sélectionner sur la palette de composants Standard et le placer, avec un clic sur la fiche.
Il ne sert à rien en général de poser un seul RadioButton, car les RadioButtons sont prévus pour choisir entre plusieurs alternatives. Ainsi, vous pouvez utiliser aussi un
TRadioGroup à la place de RadioButtons individuels.
Partout dans votre code source, vous pouvez obtenir l'état des RadioButtons, actif ou inactif, en interrogeant Status := <RadioButton>.Checked;. Vous pouvez utiliser Checked comme un booléen normal. Ainsi, l'affectation <RadioButton>.Checked := True; est possible.
Un simple exemple
- Créez une nouvelle application et placez trois RadioButtons sur la fiche.
- Dans l'onglet Propriétés de l'inspecteur d'objets, changez les noms des RadioButtons en rbRed, rbGreen et rbBlue.
- De la même façon, vous pouvez changer les intitulés des RadioButtons en Red, Green et Blue.
- Ajoutez à votre fiche, un bouton et changez son intitulé en Draw new et son nom en btnPaint.
- Créez le gestionnaire d'événement OnClick pour le bouton, en utilisant l'onglet Evénements de l'inspecteur d'objet, sélectionnez l'événement OnClick et cliquez sur le bouton [...] ou double-cliquez le bouton sur la fiche.
- Ajoutez le code suivant :
procedure TForm1.btnPaintClick(Sender: TObject);
begin
  if rbRed.Checked   then Color:=clRed;
  if rbGreen.Checked then Color:=clLime;
  if rbBlue.Checked  then Color:=clBlue;
end;- Ouvrez votre application, elle devrait ressembler à quelque chose comme cela :
Usage d'un événement
A la différence avec l'exemple précédent, nous ne repeignons pas la fiche en cliquant sur le bouton mais en cliquant sur les RadioButtons eux-mêmes.
Vous pouvez modifier l'exemple précédent, en supprimant le bouton et son gestionnaire d'événement OnClick dans le code source, vous pouvez créer un nouvel exemple mais aussi simple :
- Créez une nouvelle application et placez trois RadioButtons sur la fiche.
- Dans l'onglet Propriétés de l'inspecteur d'objets, changez les noms des RadioButtons en rbRed, rbGreen et rbBlue.
- De la même façon, vous pouvez changer les intitulés des RadioButtons en Red, Green etBlue.
- Maintenant vous pouvez créer les gestionnaires d'événement pour les RadioButtons. Pour chacun d'eux, vous pouvez utiliser l'onglet événements de l'inspecteur d'objet, sélectionner l'événement OnChange et cliquez sur le bouton [...], vous pouvez aussi double-cliquer dessus.
- Faites changer la couleur de la fiche par le gestionnaire d'événement OnChange selon le RadioButton sélectionné :
procedure TForm1.rbRedChange(Sender: TObject);
begin
  Self.Color:=clRed;    //with "Self", you select the object in which the method exists (method: rbRedChange / object: Form1)
end;

procedure TForm1.rbGreenChange(Sender: TObject);
begin
  Form1.Color:=clLime;  //You can directly select the object ''Form1'', but poor,
                        //because then no other object of class 'TForm1' can be created
end;

procedure TForm1.rbBlueChange(Sender: TObject);
begin
  Color:=clBlue;        //or you leave out "Self" and the compiler will automatically detect its own object
end;- Ouvrez votre application, elle devrait ressembler à ceci :
Groupement
If you add a radiobutton to your form is its parent (control, which includes the radio button) your form. By each setting (no matter whether via code or user button click) of a <RadioButton>.Checked:=True; is checked whether a different radiobutton, with this parent, is selected and if yes, the property Checked of this would be changed to False.
If you want to use multiple radiobuttons on your form, that are designed to provide different, independent choices, you must group the radio buttons. There are a finished component TRadioGroup or you group on a control (e.g. TPanel, TGroupBox, TNotebook, TPageControl etc.).
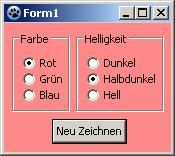
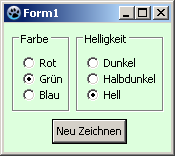
The following example shows how you can group radio buttons:
You can change the example A simple example or create a new application:
- As first you would need to place a TGroupBox of the standard component palette onto your form.
- You change its name to gbColor and its caption to Color.
- Now you subclass this GroupBox that radio buttons rbRed, rbGreen and rbBlue:
- In the modified project, you can sequentially move the radiobuttons in the Object Inspector by drag and drop to gbColor.
- In a new project, you can insert the three radiobuttons one after the other, by clicking to insert in the GroupBox, then change the names to rbRed, rbGreen and rbBlue and the captions to Red, Green and Blue.
- Now place a second TGroupBox on your form named gbBrightness with the caption Brightness.
- Add this GroupBox also three radio buttons and give it the name rbBrightDark, rbBrightMedDark and rbBrightBright and the captions Dark, MediumDark and Bright.
- If you have created a new application, you must add a button with name btnPaint and caption Draw new to the form.
- In the OnClick event handler of btnPaint change the code to:
procedure TForm1.btnPaintClick(Sender: TObject);
begin
  if rbRed.Checked   then Color:=Brightness or clRed;
  if rbGreen.Checked then Color:=Brightness or clLime;
  if rbBlue.Checked  then Color:=Brightness or clBlue;
end;- Now create even the function Brightness, by enter the private section of TForm1, write
function Brightness: TColor;and press the keys [CTRL] + [Shift] + [c] (code completion). The function is created. Enter there following code:
function TForm1.Brightness: TColor;
begin
  Result:=0;
  if rbBrightMedDark.Checked then Result:=$888888;
  if rbBrightBright.Checked  then Result:=$DDDDDD;
end;- Start your application, you can use the grouped radio buttons separate, so it could look like:
Voir aussi
- Doc. TRadioButton
- TRadioGroup - Usage de RadioGroups
- TToggleBox - Usage de Toggleboxes
- TCheckBox - Usage de CheckBoxes


