Difference between revisions of "Form Tutorial/ja"
| Line 264: | Line 264: | ||
このようにUnit1の中でUnit2のすべてのパブリック変数/プロパティ/関数/プロシージャ(一般的なメソッド)にアクセスできる。 | このようにUnit1の中でUnit2のすべてのパブリック変数/プロパティ/関数/プロシージャ(一般的なメソッド)にアクセスできる。 | ||
| − | == | + | == 他のフォームに関する事柄 == |
| − | === | + | === もう1つのフォームをメインフォームとして使う === |
| − | + | もし起動時にしばらく異なるフォームもしくは視覚的に新しいフォームを表示させたいと決めたとすると、メインメニュー、プロジェクト -> プロフェクトオプション -> フォーム...を実行できる: | |
[[Image:Projekteinstellungen_Formulare.png]] | [[Image:Projekteinstellungen_Formulare.png]] | ||
| − | + | また別に、メインメニュー、プロフェクト -> 表示(Lazarus 3.2ではShowというメニューはない) .lprファイル、Project.lpr(メインプログラムのPascalコード)から、最初に表示されるフォームを作ることができる: | |
<syntaxhighlight lang=pascal> | <syntaxhighlight lang=pascal> | ||
program Project1; | program Project1; | ||
... | ... | ||
| − | Application.CreateForm(TForm2, Form2); // | + | Application.CreateForm(TForm2, Form2); //Form2が最初に作られ、アプリケーションが起動されるときに表示される |
Application.CreateForm(TForm1, Form1); | Application.CreateForm(TForm1, Form1); | ||
</syntaxhighlight> | </syntaxhighlight> | ||
Revision as of 13:04, 16 March 2024
│
Deutsch (de) │
English (en) │
suomi (fi) │
日本語 (ja) │
中文(中国大陆) (zh_CN) │
Lazarusでフォームを用いるための短いイントロダクション。
フォームとは何か
フォーム (class TForm)はapplicationのユーザーインターフェースとなるウインドウもしくはダイアログを表す。それは他のcomponents(例えば、ボタン、ラベル、編集ボックス、画像など)が挿入されるコンテナである。
最初のGUIアプリケーション
Lazarusのインストールが成功し、新しいアプリケーションプロジェクトを始めると、空のフォームが作られる。そうでなければ、新しい GUI アプリケーションを メインメニュー -> プロジェクト -> 新規プロジェクト -> アプリケーション OKで作ることができる。
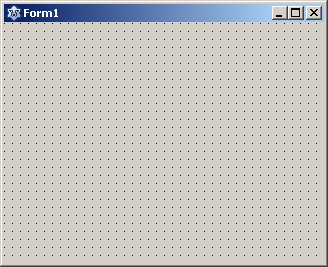
今、新しい、全機能が使えるフォームを持つプロジェクトが作成された:
新しく作られたプロジェクトを実行するには、単にF9キーを押す、もしくはマウスでメインメニューアイコン![]() (あるいは メインメニュー: 実行 -> 実行)をクリックする。プロジェクトはコンパイル、実行される。
(あるいは メインメニュー: 実行 -> 実行)をクリックする。プロジェクトはコンパイル、実行される。
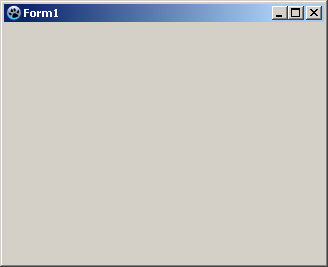
特に面白いことが起こるわけではない。フォーム(Form1)はわずかに外見が変わり、ラスタグリッドの点々(個々のコンポーネントの位置付けの助けとなる)が消える(グリッドの点が見えてる間は、それがデザインモードにあることがわかる):
次にフォームの上にTButtonを配することができる。これは後に第2のフォームを開くことを可能にするために使われる:
Component Palette上のStandard tabからTButtonを選ぶ。
そしてフォームをクリックする: 「Button1」の名前とキャプションでForm1にボタンが配される。
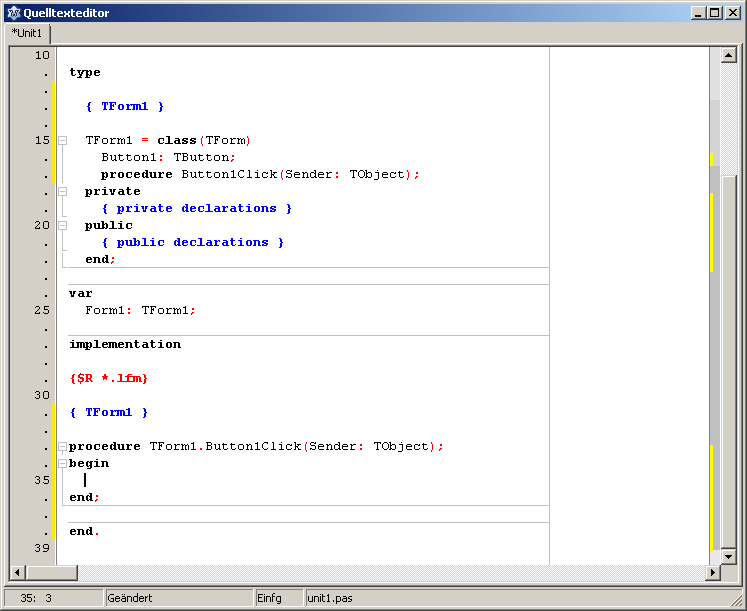
このボタンに何かをさせるために、それをクリックすると、何か意図したことをするようにボタンに告げなければならない。これは単純なイベントである。このためクリックされた後に呼ばれる イベントハンドラが必要である。マウスに対するイベントハンドラはボタンはButton1をダブルクリックすることにより、極めて簡単に行える(もしくはオブジェクトインスペクタで、Button1 -> イベントタブ -> OnClick、次いで[...]をクリック)。これはButton1がクリックされると(設計段階ではなくruntime)にいつも呼ばれるプロシージャTForm1.Button1Clickをコードエディタに作り出す。
アプリケーションにButton1をクリックした後に何かをさせるために、プロシージャTForm1.Button1ClickのBeginとEndの間にこのようにコードを加える:
procedure TForm1.Button1Click(Sender: TObject);
begin
  Caption:='My first Form';  //Caption of Form1 is changed (text in formhead)
  //or
  Button1.Caption:='Hello';  //Caption of button is changed (shown text of button)
end;
そして、F9を押し、フォームを起動させる、ボタンをクリックしたときにフォームキャプションとボタンキャプションの双方が変わることに注意すること。
ちょっとした実験を行い、スタンダードコンポーネントの使い方を学んだ。始めるにあたり、以下のコンポーネントの例を試してみることを勧める:
| TButton | |
| TLabel | |
| TEdit | |
| TMemo | |
| TToggleBox | |
| TCheckBox | |
| TRadioButton | |
| TListBox | |
| TComboBox | |
| TScrollBar |
ここにさらに役に立つ情報があるLazarus Tutorial。
2つ目のフォームを使う
このチュートリアルでは1つのプロジェクトで複数のフォームを使う方法を示す。この例で2つだけのフォーム、Form1(メインフォーム)とForm2が作られるが、追加のフォームについてもその仕方は同一である。
クリックされると新しいフォームを開くボタンがメインフォームにある。新しいフォームはまた、クリックされるとそれ自身を閉じ、メインフォームに帰ってくるボタンを有する。
もし最初のチュートリアル、 初めてのGUIアプリケーションを終えているのなら、TForm1.Button1Clickプロシージャのbeginとendの間のコードを削除しておく必要がある。そうしないと、新たなプロジェクト(アプリケーション)フォームにボタンを置き、キャプション(ボタンの上の表示されるテキスト)を入力し、OnClickイベントハンドラをこのButton1に作らなければならない。
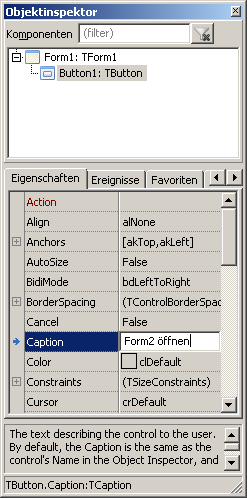
これを行うためボタンを選択(一度クリックする)し、オブジェクトインスペクタで、プロパティ -> Caption、「Open Form2」と入力する。
2つ目のフォーム(Form2)をプロジェクトに加えるため、メインメニューで ファイル -> 新規フォームを実行する。Form2にボタンを置きそれにOnClickイベントを作る。このボタンのキャプションを「Close」に変更する。
いま、このプロジェクトは2つのフォームを持ち、それぞれはメインメニュー、プロジェクト -> フォーム...(もしくはキーの組み合わせ⇧ Shift + F12)で選択、表示できる。また別に、ソースエディタでUnitタブで選択もでき、F12でコードエディタとUnitに割り当てられたフォームデザイナとを切り替えできる。
source code editorでUnit (Unit1)が割り当てられたForm1に行きUsesに節「Unit2を加える:
uses
  Classes, SysUtils, ... , Unit2;  // それぞれのユニットがコンマ(,)で区切られていることと
                                   // uses 節がセミコロン(;)で終わることは重要である。
今、Unit2(即ちForm2)をUnit1から呼び出すことができる。
次に、Form1に属するボタンのOnClickイベントを編集する:
unit Unit1;
...
procedure TForm1.Button1Click(Sender: TObject);
begin
  Form2.ShowModal;  //Form2を表示、フォーカスはForm2に来る。
end;
unit Unit2;
...
procedure TForm2.Button1Click(Sender: TObject);
begin
  Close;  //Form2を閉じる
end;
これで、プロジェクトを起動(![]() もしくは F9)し、Form1のボタンをクリックすることでForm2を開くことができる。
もしくは F9)し、Form1のボタンをクリックすることでForm2を開くことができる。
ShowとShowModalの違い
Showおよび ShowModalメソッドは双方ともフォームを見えるようにする。ShowとShowModalの違いを見るために:
- 前の例、Form1The use of a second formに2番目のTButtonを加え拡張する。
- Button1を選択しプロパティNameを btnShowに、Captionを Showに変更する。
- Button2を選択しプロパティName をbtnShowModalに、CaptionをShowModalに変更する。
- OnClickイベントを作る(もしくは、変更)し2つのボタンのイベントハンドラを以下のようにする:
procedure TForm1.btnShowClick(Sender: TObject);
begin
  Form2.Show;
  ShowMessage('Form2 is opened!');
end;

procedure TForm1.btnShowModalClick(Sender: TObject);
begin
  Form2.ShowModal;
  ShowMessage('Form2 is opened and closed again!');
end;
- 起動してその差を見よう!
- Show
このプロシージャはフォームを見える状態にし、呼んだコントロール(Form1)のコードの実行を継続する。この例ではメッセージ、(ShowMessage) はほとんどForm2と同時に現れる。またForm1を呼んで使い続けることができる。例えばそれを動かしたり、Showボタンを押すことができる(しかしShowModalをクリックするとエラーが発生するだろう)。
<myForm>.Show;を用いる代わりに、<myForm>.Visible:=True;を用いることもできる、Showメソッドは以下を行う:
procedure TCustomForm.Show;
begin
  Visible := True;
  BringToFront;
end;
<myForm>.Show;と<myForm>.Visible:=True;の唯一の違いは、Showを用いてフォームを表示すると、現在表示されているすべての他のフォームの上に表示されることである。
- ShowModal
ShowModalは新しく開かれているフォーム(Form2)が閉じられるまで呼び出したコントロール(Form1)を停止させる。例では、ShowModalの直後のShowMessage行はForm2が閉じた後にのみ実行される。フォームの呼び出しは固まってしまう;Form1を動かすこともそれが持つどのボタンも押すことができない。
ShowModalは整数値の結果を返す関数である。TModalResultを参照のこと。返された値によりどのようにフォームを閉じたかを分岐できる。
お互いを呼び出すことのできる2つのフォーム
2番目のフォームからメインフォームを呼ぶことを避けるのは一般的に良いプログラム設計である。2番目のフォームを閉じることによって、(前の例のように)メインフォームへ戻り、メインフォームにフォーカスを返すこともより好ましい。しかしこの例が示すように、サブフォームからメインフォームを呼ぶことは可能である。
Form1がForm2を呼ぶために、Unit1はそのUses節の中にUnit2を持っていなければならない。 逆にForm2がForm1を呼ぶために、Unit2はそのUses節にUnit1を持っていなければならない。これはお互いのユニットが他のユニットを参照しあう、潜在的な循環ユニット参照コンパイラエラーにつながる。この例は循環ユニット参照エラーをどのように避けるかも示している。
この例を設定するために、前の例(The Use of a Second Form)のフォームを改造する、、もしくはそれぞれが1個のボタンを持つ新しいプロジェクトを作る。Form1.Button1のキャプションを「Open Form2」、Form2.Button1のキャプションを「Open Form1」と設定する。
もし、前の例を改造するなら、Unit1のUses節から「Unit2」を除くこと。
それぞれのUnitのImplementationセクションにUses節を加える。Unit1の節にUnit2を、Unit2の節にUnit1を加えると以下のようになる:
unit Unit1;
...
implementation

uses
  Unit2;
...
unit Unit2;
...
implementation

uses
  Unit1;
...
ボタンイベントハンドラのOnClickイベント以後にあるコードを変更する:
unit Unit1;
...
procedure TForm1.Button1Click(Sender: TObject);
begin
  Form2.Show;
end;
unit Unit2;
...
procedure TForm2.Button1Click(Sender: TObject);
begin
  Form1.Show;
end;
他のフォームに変数を渡す
上記の例、 The Use of a Second Formによれば、Unit2のinterface部で グローバル変数を宣言することができる。これはUnit1とUnit2の双方が同じ 変数にアクセスすることを可能にする(Unit1のUses節にUnit2を置くことにより、Unit2のinterface部で宣言されたすべての変数も、Unit1で利用できるようになる)。この習慣は、どの個々の変数がスコープにあるかを記憶することが急速に困難となり、潜在的なエラーの元となるので、最小限にすべきである。ローカル変数を使い、Classの中の プロパティを、あるいは別にクラスの中の変数として定義することがより好ましい。
次のプロジェクトでは、2番目のフォームをボタンのクリックで開く。この時、メインフォームのユニットが2番目のフォームが何回表示されたかを勘定する。この2番目のフォームでボタンをクリックすることで、何回それが開かれたを見るために尋ねることができる:
- 2つのフォームを持ち、それぞれボタンがあり、それらを評価するOnClickイベントがある新しいプロジェクト。
- ここで、Countという名前の整数型のClass TForm2のpublic部の変数(この場合変数の悪用として定義する 定数)が作り出す:
unit Unit2;
...
  TForm2 = class(TForm)
    Button1: TButton;
    procedure Button1Click(Sender: TObject);
  private
    { プライベート宣言 }
  public
    { パブリック宣言 }
    const Count: Integer = 0;   //ここ
  end;
- Buttonイベントハンドラをそれに応じてカスタマイズする:
unit Unit1;
...
procedure TForm1.Button1Click(Sender: TObject);
begin
  inc(Form2.Count);  //Form2が呼ばれるたびにカウンタを1つ増やす
  Form2.ShowModal;
end;
unit Unit2;
...
procedure TForm2.Button1Click(Sender: TObject);
begin
  ShowMessage('Form2 would be displayed '+IntToStr(Count)+' times');
end;
このようにUnit1の中でUnit2のすべてのパブリック変数/プロパティ/関数/プロシージャ(一般的なメソッド)にアクセスできる。
他のフォームに関する事柄
もう1つのフォームをメインフォームとして使う
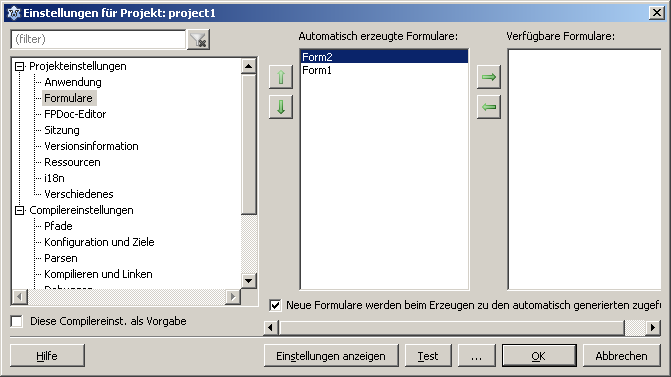
もし起動時にしばらく異なるフォームもしくは視覚的に新しいフォームを表示させたいと決めたとすると、メインメニュー、プロジェクト -> プロフェクトオプション -> フォーム...を実行できる:
また別に、メインメニュー、プロフェクト -> 表示(Lazarus 3.2ではShowというメニューはない) .lprファイル、Project.lpr(メインプログラムのPascalコード)から、最初に表示されるフォームを作ることができる:
program Project1;
...
  Application.CreateForm(TForm2, Form2);  //Form2が最初に作られ、アプリケーションが起動されるときに表示される
  Application.CreateForm(TForm1, Form1);
プログラムの終わりで形のプロパティを保存する
動的にフォームを作るGenerate the form dynamically
Lazarusによってデザインされたフォームを動的に作る
You do not have to create all the forms that may be called during the term of an application at startup. Some developers generally keep none of it and delete the code automatically created when you insert a new form in a project from the Projekt.lpr out immediately. If you want to write a library that contains a couple of GUIs, you can not get around the dynamic creation of forms.
An example:
- new application with two forms, Form1 a button (add "Unit2" in the uses clause of unit1)
- open the Projekt.lpr (Project -> lpr file.)
- delete the line "Application.CreateForm(TForm2, Form2);"
- in the OnClick event of Button1, Form1 add following code:
procedure TForm1.Button1Click(Sender: TObject);
begin
  Form2:=TForm2.Create(Nil);  //Form2 is created
  Form2.ShowModal;            //Form2 is displayed
  FreeAndNil(Form2);          //Free Form2
end;
- now simply start
新しいフォームを動的に作り出す
The following example will demonstrate how new forms can be generated in code, without using the Form Designer,.
In this example clicking a button should open another form that itself contains a button. Clicking this second button makes a message appear warning that the form will close; then the form is closed.
- Create a new application with a form and a button
- In the OnClick event of Button1, in Form1, add the following code:
procedure TForm1.Button1Click(Sender: TObject);
var
  MyForm: TForm;
  MyButton: TButton;
begin
  MyForm:=TForm.Create(nil);
  MyForm.SetBounds(100, 100, 220, 150);
  MyForm.Caption:='My dynamic created form';

  MyButton:=TButton.create(MyForm);
  MyButton.Caption:='Close my form';
  MyButton.SetBounds(10, 10, 200, 30);
  MyButton.Parent:=MyForm;

  MyButton.OnClick:=@MyButtonClick;

  MyForm.ShowModal;

  FreeAndNil(MyForm);
end;
- now the event handler for MyButton.OnClick must be created. To this end, write in the private section of class TForm1 the following procedure declaration:
TForm1 = class(TForm)
...
private
  { private declarations }
  procedure MyButtonClick(Sender: TObject);
- press Ctrl]+⇧ Shift+C (code completion) and insert the following code as the handler implementation:
procedure TForm1.MyButtonClick(Sender: TObject);
begin
  Showmessage('Attention, closing my dynamically created form!');
  if Sender is TButton then
    TForm(TButton(Sender).Parent).Close;
end;
- now the project can be compiled and executed
以下も参照のこと
- Tips for manual generation of controls
- Example to create a complete GUI application by code
- Testing, if form exists
- Canvas draw vertical line on form/de
- Drawing with canvas on form
- user should not be able to close form
- Creating a non-rectangular window or control
- Remember form position and size
- Form in DLL
